by Rod Shaw
An Inauspicious Start
My introduction to chassis building was not a happy one, being an abortive attempt to build a tiny LNER Y7. No reflection on Messrs Finney and Smith, from whom I bought the kit – it’s just not a beginner’s project, and after two dismantlings I still haven’t got it to run well or to fit inside the body. One day I will succeed, but for now something more straighforward was needed, so I decided to have a go at the SR G6 0-6-0T from 3SMR.
Parts
Apart from oddments I sourced all the parts I needed from 3SMR and Branchlines.
-
Etched nickel silver chassis from G6 0-6-0T whitemetal kit – 3SMR Cat. No. C8/X.
-
Romford 14″ diameter wheels – 3 live, 3 insulated, middle wheel on each side unflanged to cope with my tight curves though this is obviously a matter of choice. 3SMR Cat. Nos R/18 (x2), R/18U (x1), R/25 (x2), R/25U (x1).
-
Romford axles with wheel nuts – 3SMR Cat. No. RA.1 (x3).
-
Romford crankpins with washers – 3SMR. Cat. No. R31/6 (pack).
-
2 Romford 0.005in. brass washers – 3SMR Cat. No. R.62 (pack).
-
6 Romford axle nut covers – 3SMR Cat. No. RC.2 (pack).
-
1/8in. straw-hat bearings – 3SMR Cat. No. L/065 (pack).
-
1 cast spacer – 3SMR Cat. No. L/093 (pack of 2).
-
2 Branchlines screw-up frame spacers (pack of 3).
-
Mashima 9/16 motor and RSL 50:1 gearbox from Branchlines.
-
Piece of PCB approx. 5mm square and 60mm length of pick-up wire.
-
2 small lengths of fine plastic-coated wire, 20-25mm long, for motor connection.
-
Small brass strip, approx. 6mm by 12mm, bent at right angles for mounting pick-up on chassis.
-
2 more brass strips, approx. 5mm by 10mm, for fixing motor to chassis.
Tools
-
145 degree solder and 12% phosphoric acid flux, many sources, bought mine both from London Road Models.
-
Soldering iron – mine is a 12W Weller which I’ve had for ages. This works fine, though I believe 25W or thereabouts are generally recommended.
-
Romford nut driver – 3SMR Cat. No. R.11.
-
Set of precision screwdrivers.
-
Flat and half-round needle files.
-
Small wire snips or craft knife.
-
Araldite Rapid or superglue (I used the former).
Method
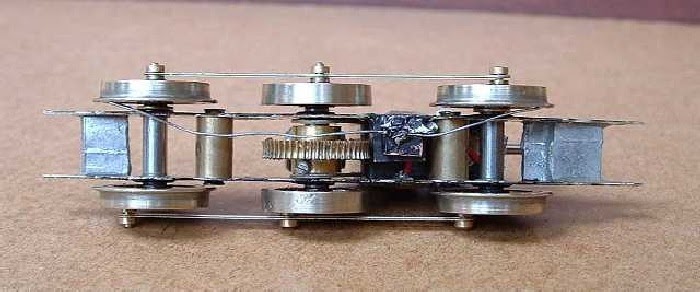
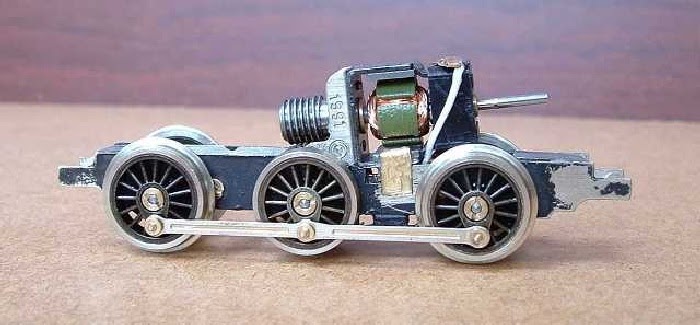
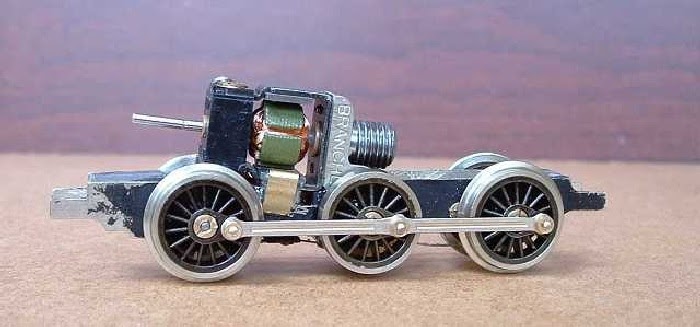
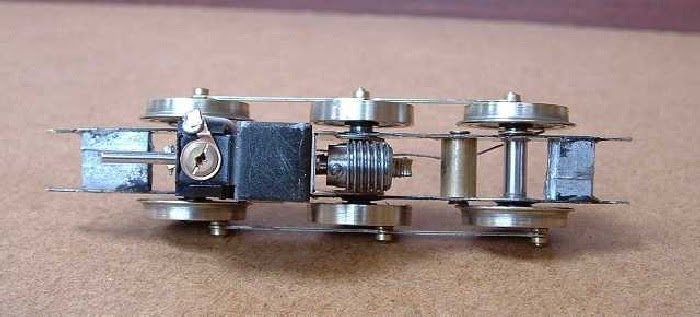
If a picture paints a thousand words, look at the photos and theoretically these instructions won’t be necessary, but here goes anyway. (You may think from the underside view that the chassis is skewed, I can assure you that this is an optical illusion caused by the irregular way I cut the front and rear chassis spacers!)


